Libraries![]() Demos
Demos
Updated Jul 2025
OTA (Using OTA Agent Orchestrator)
Preamble
While this demo uses the AWS IoT OTA update service, FreeRTOS is generic MIT licensed open source software,
and can be used with any OTA mechanism that works for you. We do however recommend you digitally sign your
firmware, whichever OTA method you choose. That way the devices that receive the new executable image can
verify it came from an authorized source and has not been been modified. You can
use Code Signing for AWS IoT to
sign your firmware or you can sign with your own code-signing tools.
to
sign your firmware or you can sign with your own code-signing tools.
Demo Introduction
OTA Agent Orchestrator: This orchestrator is designed to mimic the OTA agent found in the old OTA repository. The OTA agent orchestrator operates by managing a state machine that tracks the current status of the download process. The state machine is influenced by receiving events that are sourced by either internal calls or the main application. The OTA agent receives all of the events and processes them accordingly. This demo use FreeRTOS, coreMQTT, MQTT file streams and IoT Jobs library.
The OTA agent also supports Suspend and Resume functionality. The OTA agent can be suspended at any stage of the OTA process and can be resumed later. the OTA agent can be suspended by an OtaAgentEventSuspend event and resumed with an OtaAgentEventResume event.
The OTA agent orchestrator Demo source code is organized in ota_demo.h and ota_demo.c files. These files
can be found here.
In this demo there are three tasks, OTA task, MQTT task and Suspend/Resume task. The functioning of each task and how they interact with each other is explained below.
OTA task
This task manages the state machine for the OTA agent. processOTAEvents is the function which receives and processes all of the incoming events.
The description of all the events are as follows:
OtaAgentEventRequestJobDocument:
This event makes the OTA agent to request IoT core for any pending jobs.
OtaAgentEventReceivedJobDocument:
This event is triggered when the Job document is received. The received job document is then parsed
and checked if it is a OTA job or not. If the received job document is for an OTA job. Then the MQTT
stream downloader is initialized and a request for a file block is sent.
OtaAgentEventRequestFileBlock:
This event creates and sends the request for a file block.
OtaAgentEventReceivedFileBlock:
This event is triggered when the MQTT message containing the file block is received. The received MQTT
message is then parsed to extract and decode the data block.
OtaAgentEventCloseFile:
This event is triggered when the last file block has been received. This event finishes the download
and performs the clean up.
OtaAgentEventSuspend:
This event can be used to suspend the functioning of the OTA agent.
OtaAgentEventResume:
This event can be used to resume the suspended OTA agent.
MQTT task
This task runs the MQTT process loop, which processes all the incoming MQTT messages. When a MQTT message
containing a Job document or a file block is received, then this task generates the corresponding event
and sends it to the OTA agent.
Suspend/Resume task
This task is used to demonstrate the suspend resume functionality. It periodically sends the suspend
and resume event to the OTA agent.
Demo Setup
Setting up AWS IoT Core
To setup AWS IoT Core, follow
the AWS IoT Core Setup Guide.
The guide shows you how to sign up for an AWS account, create a user, and register the device with AWS
IoT Core. The following entities are generated while following the instructions in the AWS IoT Core Setup
Guide:
- A device Endpoint.
- An AWS IoT Thing (and associated ThingName).
- PEM-encoded device certificate.
- PEM-encoded private key.
- PEM-encoded root CA certificate.
The entities are required by the simulator/device in order for it to connect with AWS IoT Core.
Setting up the cloud services for OTA
-
S3 is an AWS Service that enables you to store files in the cloud that can be accessed by you or other services. This is used by the OTA Update Manager Service to store the firmware image in an S3 “bucket” before sending it to the device. Create an Amazon S3 Bucket to Store Your Update
. -
By default, the OTA Update Manager does not have permission to access the S3 bucket that will contain the firmware image. An OTA Service Role is required to allow the OTA Update Manager Service to read and write to the S3 bucket. Create an OTA Update Service Role
. -
An OTA User Policy is required to give your account permissions to interact with the AWS services required for creating an OTA Update. Create an OTA User Policy
.
Simplified OTA Setup wizard
We have created a helper wizard to improve the
AWS IoT and OTA experience. This script streamlines the creation of IoT things and OTA jobs, and also
provides thing group management functionality. The setup steps you follow are not different with this
wizard, it simply prompts you for all the information needed to connect to AWS IoT and to handle the
creation of any required OTA-related tools. We highly recommend using the setup wizard, as it both
reduces the time to connect to the AWS IoT ecosystem and is easier to use than the manual setup.
Prepare for creating the OTA update job
To send an OTA job, there needs to be an updated firmware image stored in an S3 bucket. The AWS IoT OTA Manager service will read the image out of this bucket and send it to the device.
An example of a production workflow would be:
- Write the MCU firmware, integrating the OTA Client library source code.
- Program the device hardware (the MCU) with the initial firmware.
- Make changes to and test the firmware locally.
- Generate the binary for the new version of the firmware.
- Upload the new version to S3 and Create an OTA Job using with the uploaded firmware.
Running the Demo
Build and Run the OTA demo project
The OTA demo project can be downloaded
from here. Instructions to
build the project can be
found here.
Before continuing, verify that you are able to build and run the project.
Create the OTA update job
At this point, you should have:
- Created an AWS IoT Thing with the AWS IoT Service.
- Setup the S3 bucket and managed permissions for the various services.
- Uploaded a “newer” firmware image to the S3 bucket.
- Completed the setup required for code signing.
- Configured the OTA client running on your device.
With the OTA Client running and the cloud services set up, the next step is to send the device a new firmware
image by creating an OTA job. Start by going to the AWS IoT console.
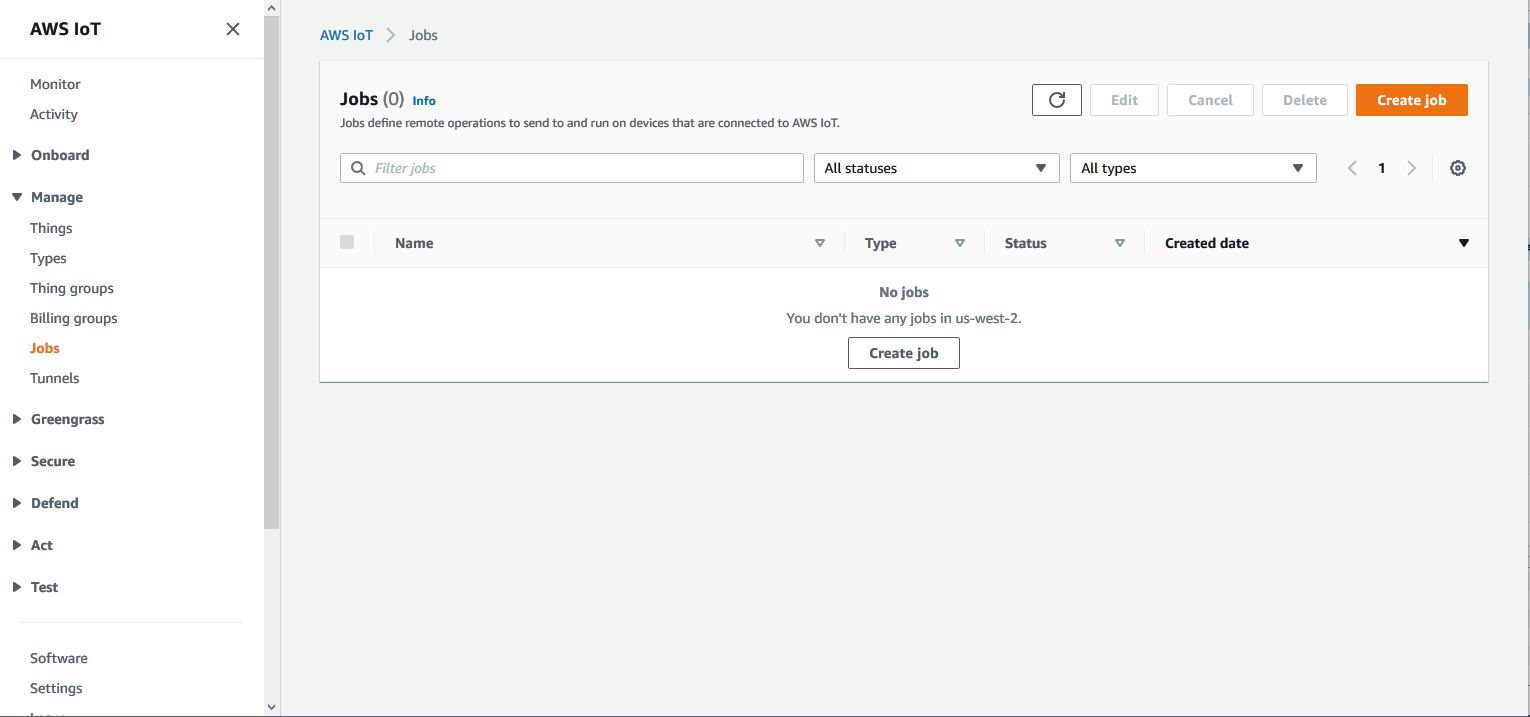
-
In the navigation pane of the AWS IoT console, choose Manage, and then choose Jobs. Then press Create Job.
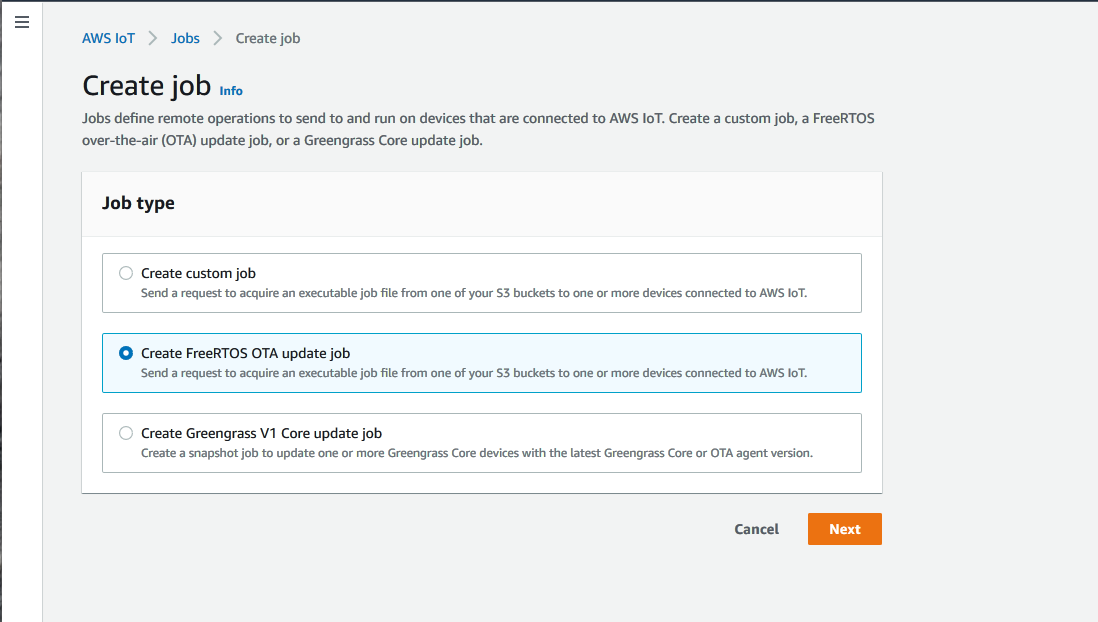
-
Choose Create FreeRTOS OTA update job, then press Next.
-
On the OTA job properties page, enter a Job name for the FreeRTOS OTA update job (for example, "ota_sim_update"). You can optionally enter a Description and add Tags to your job. Then press Next to continue.

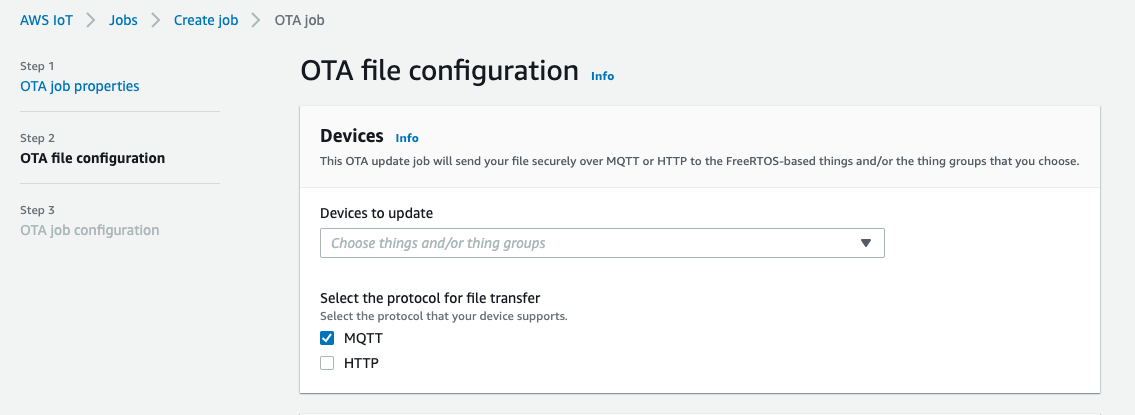
-
You can deploy an OTA update to a single device or a group of devices. On the OTA file configuration page, under Devices to update, choose the things or thing groups associated with the devices you want to update. Under Select the protocol for file transfer, select the check box next to MQTT.
-
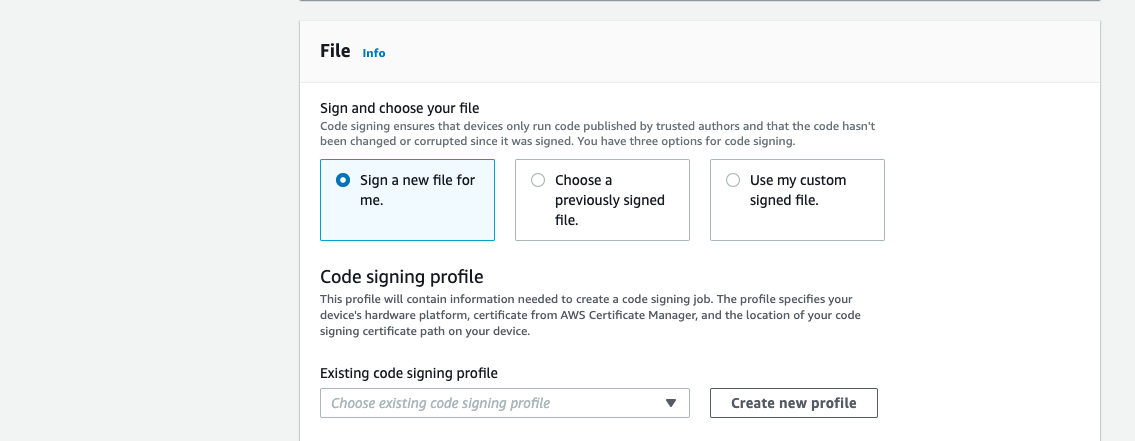
Under Sign and choose your file, keep the default option of Sign a new file for me selected. Under Code signing profile, press the Create new profile button which is next to Existing code signing profile.
-
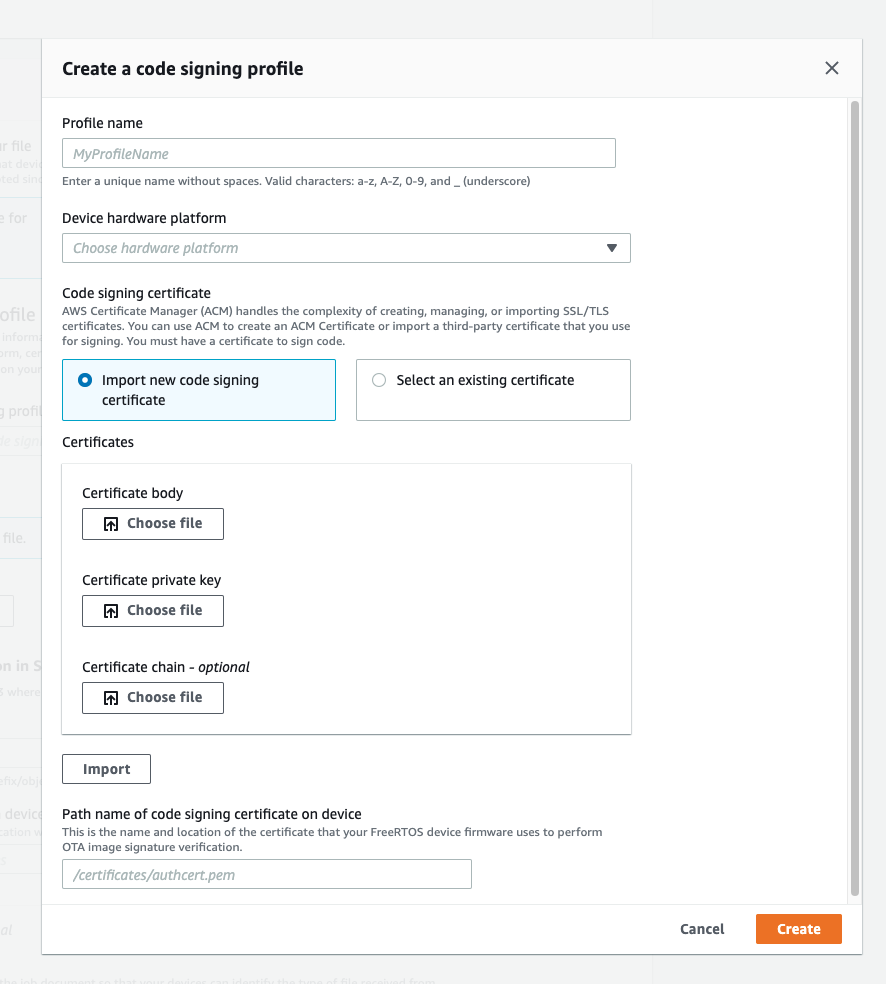
On the Create a code signing profile page, under Profile name, enter "ota_codesigning". Under Device hardware platform, select "Windows Simulator". Under Code signing certificate, change the default and select the Select an existing certificate checkbox. Under Certificates, select the certificate and certificate private keys that you generated earlier. If you followed the suggestion, these will be named "ecdsasigner.crt" and "ecdsasigner.key". Then press the Import button. Under Path name of code signing certificate on device, enter the path to the "ecdsasigner.crt" certificate that you just imported. However, for the demo you should enter "/" for the path here.
Finally, press the Create button to make the code signing profile.
-
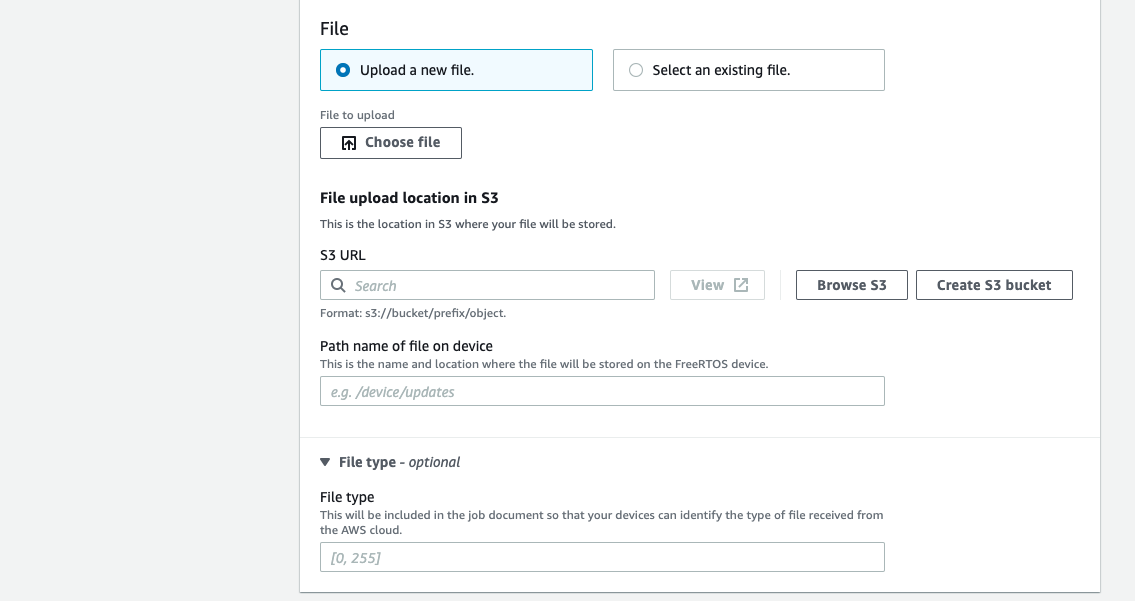
Back on the OTA file configuration page, under File, change the default and select the checkbox for Select an existing file, then press the Browse S3 button and choose the executable you uploaded to S3 during a previous step. Under Path name of file on device, enter "/". This path is where the file that is downloaded during the OTA update will be saved.
-
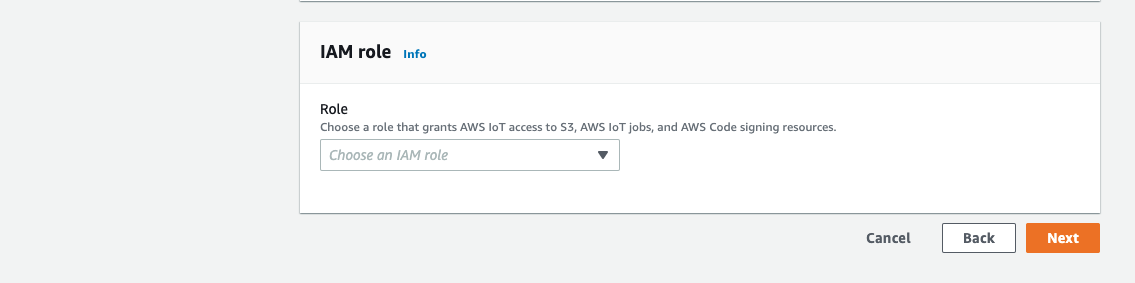
Under IAM role, select the IAM role created for the OTA process. Then press Next to continue.
-
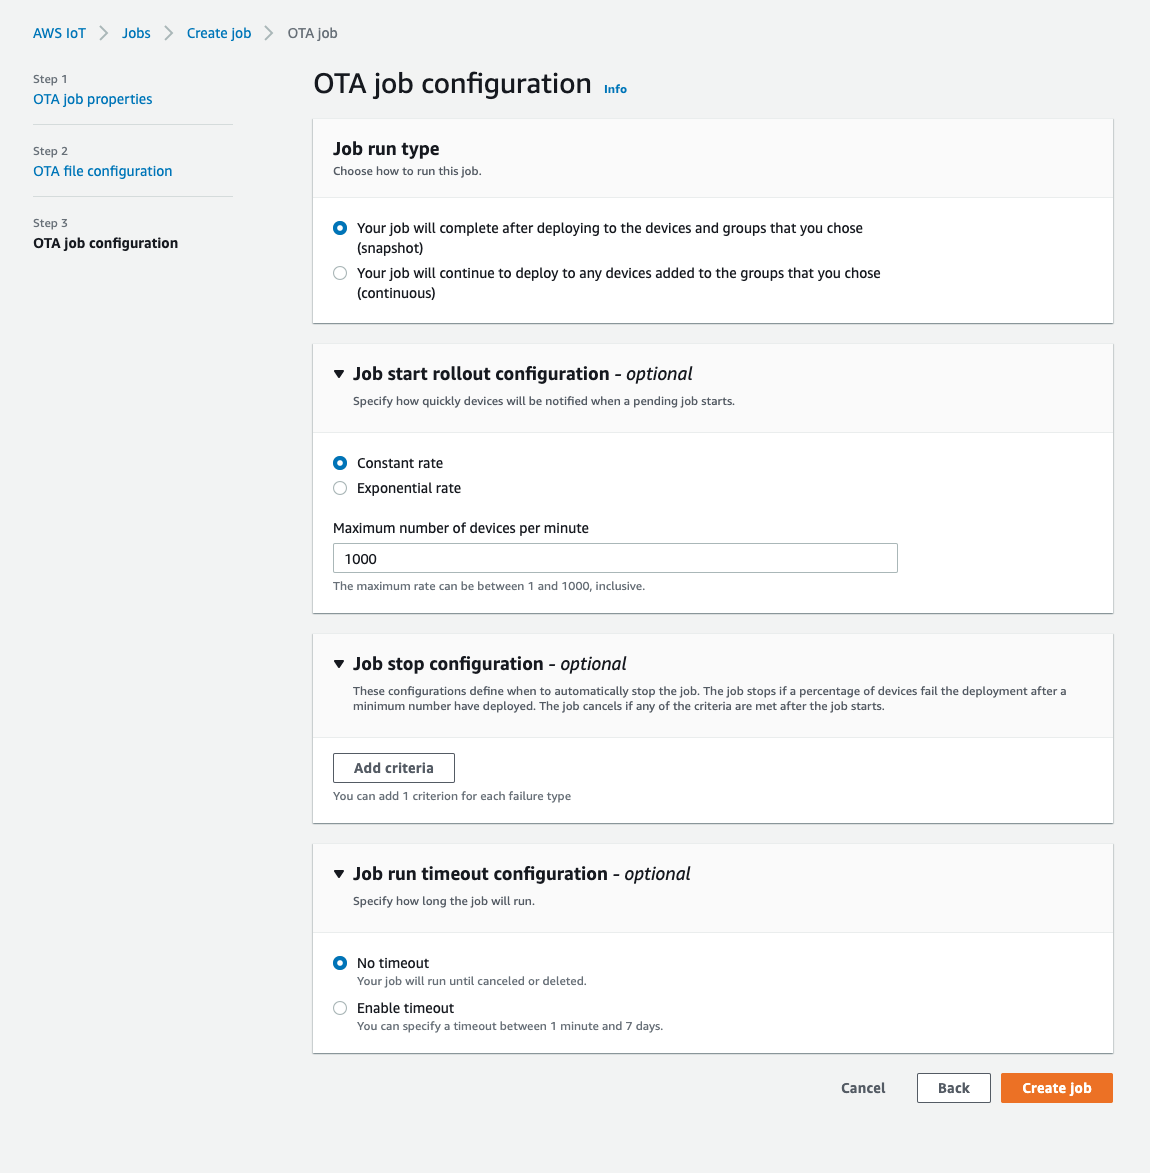
Under OTA job configuration, keep the default settings selected for Job run type (snapshot), Job start rollout configuration (constant rate), and Job run timeout configuration (No timeout). Then press the Create job button to finish creating the OTA Update Job.
-
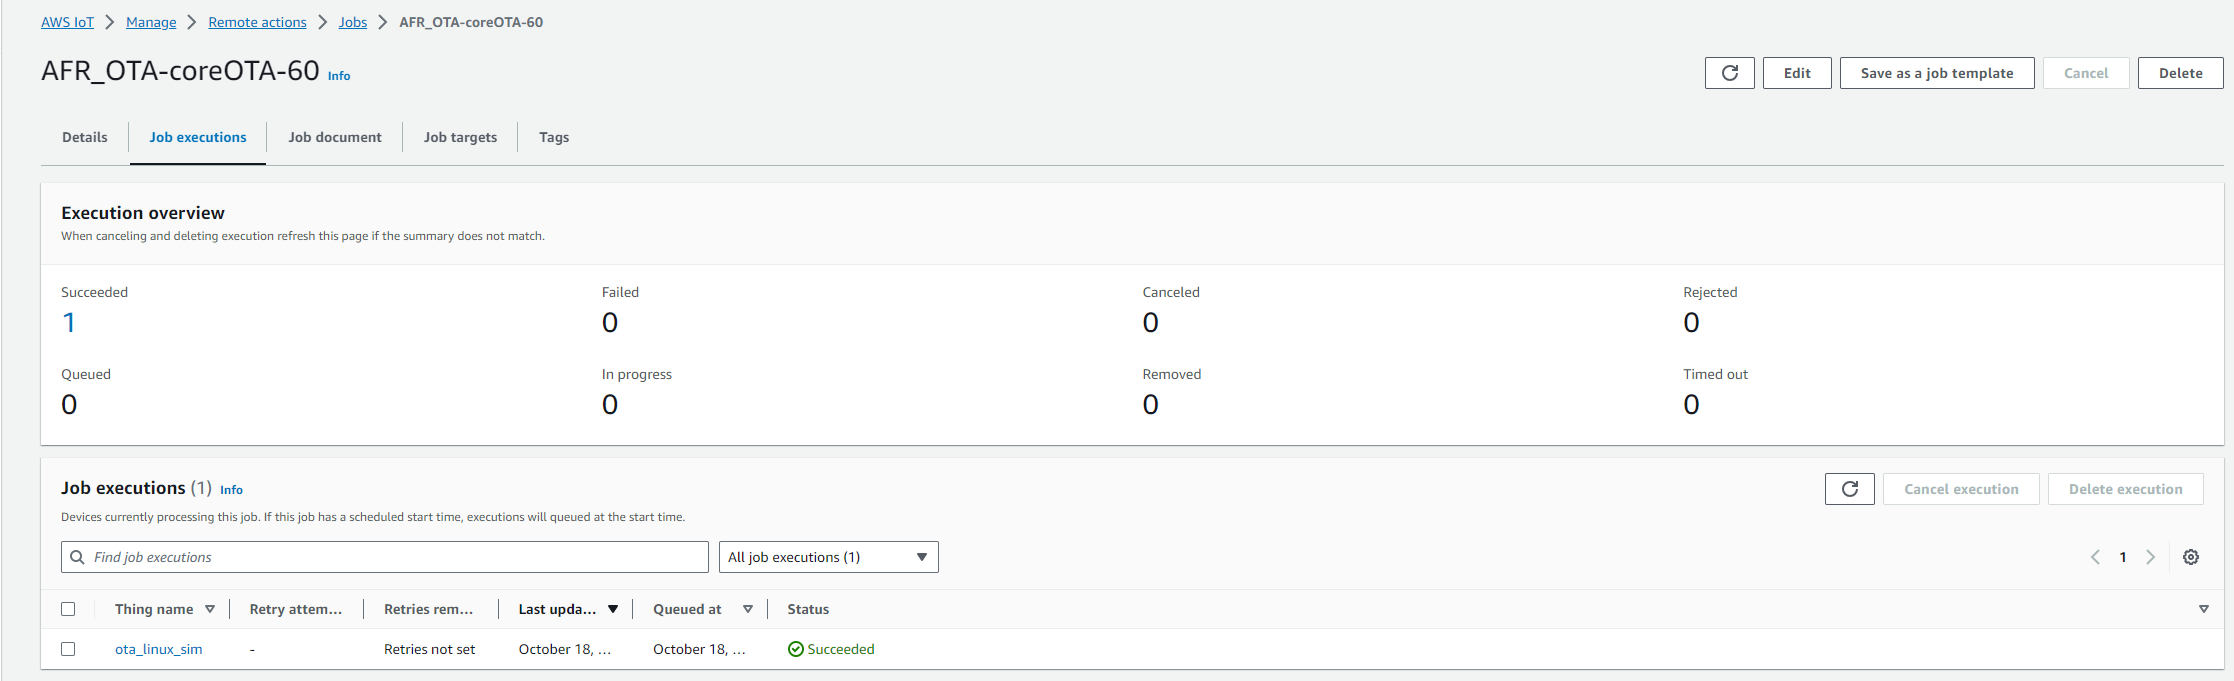
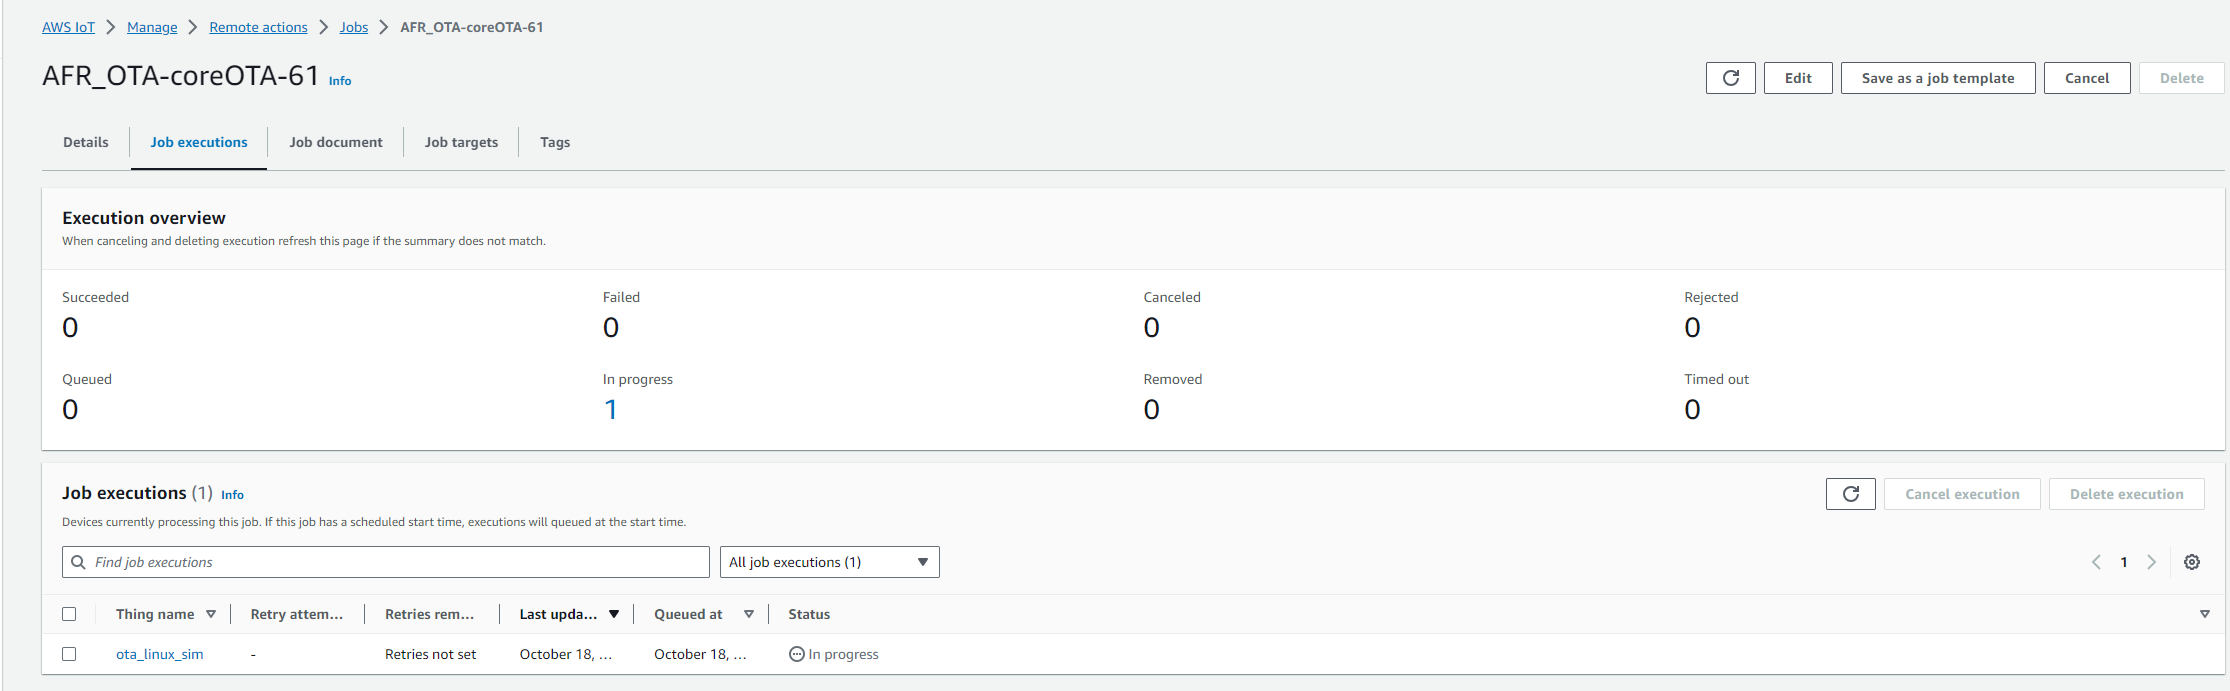
You can monitor the status of the job by pressing the “View Job” pop-up or by navigating to Manage > Jobs in the AWS IoT console. The job will be shown as “IN PROGRESS” until the device has successfully downloaded the image.
Receive the update
After the job has been created, the device should begin downloading the update. The progress of the download can be monitored through device logs. Below is an example of the device console messages:
The following message will print to the monitor after receiving the final block of the download:
When the job process is complete the state of the job will change from IN PROGRESS to SUCCEEDED in the IoT console.